How to Flush a Water Heater: Step-by-Step Guide for Homeowners
Flushing your water heater might not be the most glamorous household task, but it’s one of the most essential maintenance jobs that can help you save money and extend the life of your unit. Over time, minerals like calcium and magnesium from your water supply settle at the bottom of the water heater tank, forming sediment. This sediment buildup can lead to lower heating efficiency, higher energy bills, corrosion, and even system failure.
Fortunately, flushing a water heater is something most homeowners can do on their own. With the right tools, safety precautions, and a little time, you can keep your hot water flowing efficiently year-round. In this guide, we’ll walk you through exactly how to flush a water heater, explain why it matters, and share maintenance tips to help you avoid costly repairs.
1. Preparation and Safety
To flush your water heater safely, start by turning off its power or gas supply and allowing the water to cool to avoid injury.
Flushing a water heater begins with careful preparation. Safety should be your top priority, especially since you’re dealing with electricity, gas, and hot water under pressure. If your water heater is electric, turn off the power at the circuit breaker. For gas models, shut off the gas valve and make sure the pilot light is extinguished. These steps are crucial to prevent the water from reheating while you’re working.
Once the unit is powered down, open a hot water faucet, typically one in a bathroom or kitchen sink, or use a bucket to relieve pressure and allow air to enter the water lines. This helps cool down the water in the tank and reduces the risk of scalding. Give it at least an hour to cool if the water heater was recently used.
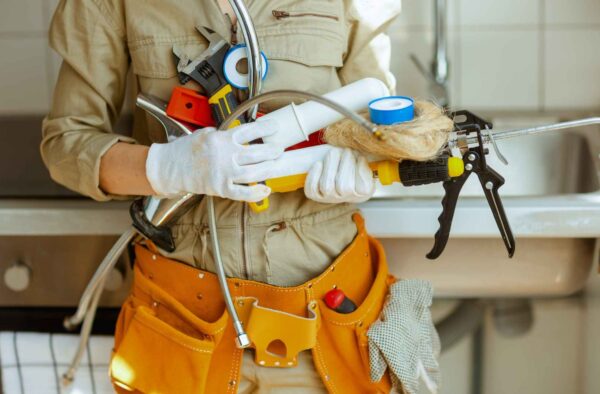
You’ll also need to hook up a standard garden hose to the drain valve located at the bottom of the tank. Run the other end of the hose to a safe location, such as a floor drain or an outside driveway, where hot water won’t cause damage.
Before you move to the next step, double-check that:
- The power or gas supply is completely off
- The tank has cooled
- The hose is securely attached to the drain valve
- The drainage area can safely handle hot water
2. Draining the Hot Water Heater
Draining your water heater removes old water and prepares the tank for a thorough flush.
With your safety precautions in place, you’re ready to begin draining the tank. Start by opening the drain valve, typically located near the bottom edge of the heater. This allows the water inside the tank to flow out through the hose. It may take anywhere from 15 minutes to over an hour to completely drain, depending on the tank size and how much sediment has built up inside.
To speed up the draining process, open a nearby hot water faucet. This action allows air to flow through the plumbing system, reducing suction and helping the water drain more quickly. If you notice a slow or blocked drain, sediment buildup might be clogging the valve.
During this step, take a few minutes to inspect the tank exterior and surrounding pipes. Look for signs of rust, corrosion, or water stains that may indicate a leak or weakening tank structure. Draining the tank provides a great opportunity to spot potential problems early.
Key reminders:
- Don’t force the valve open, use gentle pressure
- Keep children and pets away from the drain area
- If water doesn’t flow, call a plumber to avoid damaging the valve
3. Flushing Out Sediment
Flushing sediment helps prevent blockages and improves heating performance.
Once the tank is empty, the next step is flushing out any remaining sediment. Sediment tends to collect at the bottom of the water heater and can lead to popping noises, uneven heating, or premature wear on the unit.
To flush, briefly open the cold water supply valve (with the drain valve still open). This forces fresh water into the tank, stirring up sediment so it can drain out through the hose. Watch the water exiting the hose; if it’s cloudy or discolored, keep flushing until it runs clear.
Depending on how long it’s been since your last flush, this process might need to be repeated several times. Take your time. Rushing it could leave behind sediment that continues to affect performance.
If your water heater has a pressure relief valve (often on the top or side), check it for leaks or signs of mineral buildup. Never attempt to remove it during flushing. Instead, observe it during the refill and test phases for proper function.
For safety:
- Use gloves to protect your hands from heat and sediment
- Keep your face and body clear of hose ends
- Do not tamper with components like the anode rod during flushing
4. Refilling and Testing the Water Heater
Once the tank is flushed, it’s important to refill and test your heater to ensure it’s working safely and to confirm that there are no leaks.
Close the drain valve tightly and disconnect the garden hose, which is a critical step in many plumbing services. Make sure the hose end is elevated as you remove it to prevent backflow or spills.
Now, open the cold water supply valve to begin refilling the tank. At the same time, keep the hot water faucet open to allow air to escape from the water lines. Once water begins to flow steadily from the faucet, you can turn it off.
Before restoring power or relighting the gas pilot, inspect the pressure relief valve, drain valve, and surrounding pipes for any leaks. These are common areas where pressure changes can reveal weaknesses.
When you’re confident the tank is refilled and leak-free:
- Turn the power back on at the breaker (for electric units)
- Relight the pilot and restore gas flow (for gas units)
- Test hot water from a nearby faucet after 15–30 minutes
If water is not heating correctly or if strange sounds occur, contact a professional plumber. Your unit may have internal sediment buildup that requires deep cleaning or replacement.
5. Maintaining Your Hot Water Heater
Regular maintenance, like annual flushing, can extend your heater’s life and save money over time.
Your water heater should be flushed at least once per year. If you live in an area with hard water, such as parts of Connecticut and New York, flushing every six months may be necessary to combat heavy sediment accumulation.
Maintenance tips to keep your water heater in peak shape:
- Check the temperature setting (ideal is 120°F) to reduce scald risk and save energy
- Inspect the anode rod every 2–3 years and replace if more than 50% corroded
- Test the pressure relief valve annually by lifting and letting it snap shut. Replace if it leaks
- Look for signs of rust or discoloration around connections and seams
- Schedule a professional inspection if your unit is over 10 years old or is making loud noises
In some cases, replacing an old or inefficient water heater is more cost-effective than constant repairs. Look for Energy Star models for higher efficiency and long-term savings.
Conclusion
Flushing a water heater is a smart way to maintain efficiency, extend lifespan, and reduce utility costs. With basic tools and the steps outlined here, most homeowners can handle this task without professional help.
However, if you encounter signs of damage, corrosion, or ongoing performance issues, don’t hesitate to contact a licensed plumber. Regular flushing and visual inspections can help prevent costly breakdowns and keep your home’s hot water supply flowing strong.
Whether you’re a new homeowner or a long-time resident, staying proactive with water heater maintenance can pay off in comfort, savings, and peace of mind.
Not sure if your water heater is running efficiently, or safe to flush on your own? All State Plumbing Pros is here to help. Whether you need a professional flush, system inspection, or advice on replacing an aging unit, our licensed experts are available 24/7. Contact us today to schedule service and keep your hot water system running strong.
FAQs
Can I flush my water heater myself?
Yes, many homeowners can safely flush a water heater by following step-by-step instructions, and if you’re unsure, you can always respond by consulting a professional plumber for assistance. Just be sure to shut off the power or gas, allow water to cool, and take proper safety precautions. If you’re unsure or uncomfortable, a professional plumber can help.
Is it worth flushing a water heater?
Absolutely. Flushing removes sediment that affects efficiency and heating speed. It also helps reduce the risk of corrosion, odd noises, and system failure. A clean tank uses less energy and delivers hot water more reliably.
How do you flush sediment out of a water heater?
To flush sediment, drain the tank fully using the drain valve and hose. Then reopen the cold water supply briefly to stir remaining sediment. Continue draining until the water runs clear. Repeat if necessary.
How long does it take to flush a water heater?
On average, the process takes 30 to 60 minutes. This depends on tank size, sediment levels, and cooling time. Larger tanks or heavy buildup may take longer, especially if multiple flushes are required.
How do I know if my water heater needs flushing?
Common signs include popping or banging noises, rusty or discolored water, slower hot water delivery, or decreased water pressure. These indicate sediment buildup, which can reduce heater performance.